
Navisworks Clash Detection Tutorial: Step-by-Step Guide to 4D Simulation for Civil Engineers 2026 (Updated July 2026)
Most Navisworks tutorials show you where to click. This one is designed to show you why each step matters — so that when you run a real coordination session on a Pune Metro or CPWD project, you can interpret results, manage discipline teams and produce a clash report that actually gets used on site. The ABC Trainings Navisworks workshop covers both halves of the tool: clash detection (which catches physical and schedule conflicts in the federated model before they cost lakhs on site) and 4D simulation using TimeLiner (which visualises the construction sequence week by week so planning engineers can catch sequencing errors before the tower crane arrives). In 2026, both skills appear in BIM coordinator job descriptions across L&T Construction, Tata Projects and the Pune Metro contractor list — this tutorial walks through each in the order you would actually use them on a live project.
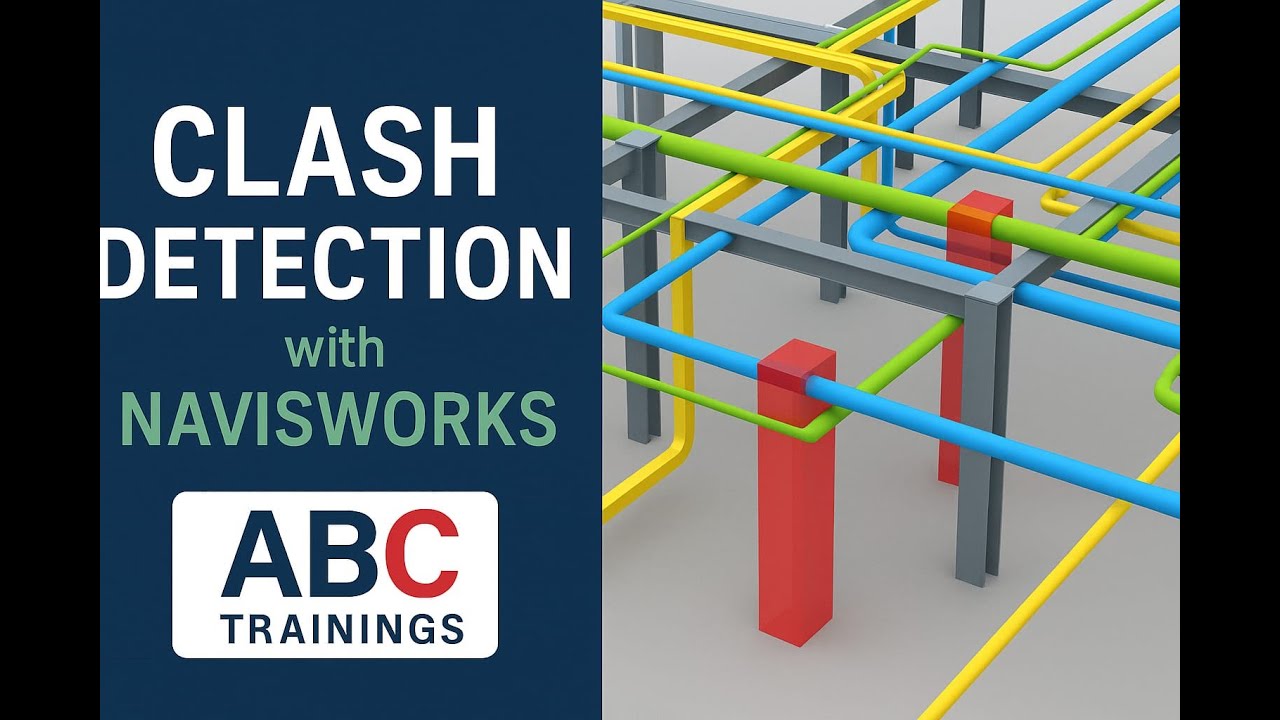
- Navisworks has two core capabilities: clash detection and 4D construction simulation using TimeLiner
- The six-step clash detection workflow covers model import, clash test setup, tolerance settings, running the test, grouping results and generating a report
- Four clash types — hard, soft, workflow and clearance — each catch a different class of site problem that costs Rs 50K to Rs 15 lakh if missed
- 4D TimeLiner simulation links Revit model elements to a project schedule so construction sequence errors are visible before mobilisation
- ABC Trainings covers live Navisworks lab sessions on real federated models at Wagholi, Hadapsar, Cidco and Sangli centres
How to Set Up Navisworks for a Clash Detection Run: The Complete Workflow
Running a professional clash detection session in Navisworks Manage follows six steps that a trained BIM coordinator can complete in under two hours for a standard mid-rise project. Step 1 — Import all discipline models. Use NWC (Navisworks Cache) files exported directly from Revit — one file for Architecture, one for Structure, one for MEP. NWC files are lighter than the native Revit files and update automatically when the source Revit model changes. Append each NWC via File > Append in Navisworks; the Selection Tree panel shows each model as a separate branch. Step 2 — Open the Clash Detective panel from the Home ribbon tab. This is the core tool — all clash tests are created, run and managed here. Step 3 — Create a new clash test. Click the Add Test button, give it a descriptive name (for example: Structural vs MEP Round 1, or Architecture vs Plumbing DD3), and select the two model sets you want to test against each other. Run Architecture vs Structure, Structure vs MEP, and Architecture vs MEP as separate tests — combined tests make the results harder to assign to the right discipline. Step 4 — Set tolerance. For hard clashes (physical overlap), 0 mm tolerance is standard. For soft clashes (clearance violations), enter the service-specific minimum clearance: 150 mm for a DN100 pipe requiring wrench access, 300 mm for major duct runs requiring maintenance personnel access. Step 5 — Click Run All Tests. Navisworks processes the federated model and populates the results grid: red for new clashes, orange for active, yellow for reviewed, green for resolved. Step 6 — Group clashes by discipline and generate a report in HTML or Excel format. Each clash row includes element IDs from both disciplines, the clash point coordinates and a thumbnail view. Export and assign each group to the relevant discipline lead in BIM 360 or via the shared report sheet.
Understanding the Four Clash Types in Navisworks: Hard Soft Workflow and Clearance
Navisworks recognises four clash types, and understanding each one is the difference between a coordination workflow that the site team actually uses and a report that gets ignored. A hard clash is the most straightforward: two objects physically intersect — a structural column cuts through a plumbing riser, a beam runs into a duct. Hard clashes are always critical; fixing them on site means cutting, rerouting or redesigning one element — always expensive. A soft clash is subtler: two elements do not touch but violate the required minimum clearance. A cable tray running 6 cm from an HVAC valve that needs 15 cm of wrench clearance is a soft clash — invisible on a 2D drawing, fatal to maintainability on site. Set Navisworks tolerance to the service-specific clearance requirement for each test to catch these. A workflow clash (also called a schedule or 4D clash) flags a construction sequence error: the slab formwork is scheduled for removal before the MEP rough-in is complete, meaning the slab must be broken after the pipe goes in. These are only catchable with TimeLiner 4D simulation — they do not appear in geometry-based clash tests. A clearance clash catches long-term access problems: HVAC equipment placed in a ceiling void with no inspection panel means the maintenance engineer can never reach it. In practice, Navisworks catches all four types in a single platform, and the clash detective filter panel lets each discipline team see only the clashes that are their responsibility to resolve.
| Navisworks Capability | What It Does | When to Use | Output |
|---|---|---|---|
| Hard Clash Detection | Finds physical overlaps between elements | Every coordination round at 0 mm tolerance | Clash report with element IDs and coordinates |
| Soft Clash Detection | Finds clearance violations (too close) | After hard clashes resolved — service-specific tolerance | Clearance report for MEP maintenance access |
| Workflow / 4D Clash | Finds sequence conflicts in the programme | TimeLiner simulation on linked schedule | 4D video + schedule clash report |
| Clearance Clash | Finds maintenance access problems | Final coordination round before IFC issue | Access audit report for facilities team |
| 4D TimeLiner Simulation | Links model to schedule for sequence check | Pre-mobilisation programme review | AVI walkthrough for client and contractor |
| Navisworks Manage 2026. All capabilities covered in ABC Trainings BIM programme at Wagholi, Hadapsar, Cidco and Sangli. | |||
How to Read and Act on Your Navisworks Clash Report
The clash report is the day-to-day coordination tool on well-run BIM projects — more important than the 3D model itself in the coordination workflow. Here is how to read one and turn it into action. Each row in the Navisworks report has five key fields: Clash Name (your test name plus an auto-incremented ID), Status (New, Active, Reviewed, Approved, Resolved), Description (auto-generated from element IDs), Element A and Element B (the two clashing objects, showing their discipline source model), and Clash Point coordinates (XYZ location in the model). The workflow after receiving the report: first, sort by status to separate New from Resolved. Second, group by discipline pair using the report filter — Structural vs MEP clashes go to the structural and MEP leads; Architecture vs MEP go to the architect and MEP consultant. Third, assign each clash a resolution action: Accepted (clearance is adequate despite the flag), Resolved (both parties agree on the solution and the model will be updated), or Deferred (design change pending). Fourth, re-run the clash test after model updates and compare new results to the previous report to confirm resolved clashes are cleared and no new clashes were introduced. A BIM coordinator who manages this loop efficiently — typically running two to three coordination rounds before construction begins — eliminates 80–90 percent of site rework costs on a large mixed-use project.
How to Run a 4D Construction Simulation in Navisworks TimeLiner
The 4D simulation in Navisworks TimeLiner is the other half of the platform that most civil engineering training courses never cover — and it is the capability that distinguishes a BIM coordinator from a BIM modeller in employer terms. TimeLiner links your Revit model elements to a project schedule (imported from Microsoft Project, Primavera P6 or an Excel file) and plays through the construction sequence week by week, highlighting which elements are being built at each time step. Here is the workflow. Step 1 — Import the project schedule. Go to TimeLiner > Data Sources > Add and import your MS Project or Excel schedule. Navisworks reads the task list, durations and dependency relationships. Step 2 — Link schedule tasks to model elements. Select each schedule task and assign it to the corresponding model element or element set in the Selection Tree. A floor slab task links to the Revit slab elements for that floor; an MEP installation task links to the duct and pipe elements in that zone. Step 3 — Assign task types. Each task is either Construct (element appears), Demolish (element disappears) or Temporary (element appears then disappears — scaffolding, formwork). Step 4 — Run the simulation. Click Play on the TimeLiner timeline and watch the model build itself week by week. A workflow clash appears as two elements assigned to the same time step that physically conflict with each other — for example, structural frames being erected in a zone where MEP installation is scheduled to run simultaneously. Step 5 — Export the simulation as an AVI or walkthrough file for presentation to the contractor or project owner. On well-run projects, the 4D simulation replaces the traditional programme review meeting — the client can see the construction sequence rather than reading a Gantt chart.
How BIM Coordinators Manage Clash Resolution Across Multiple Disciplines
Managing clash resolution across multiple disciplines is the core skill that separates a productive BIM coordination session from a meeting that produces no decisions. The most effective coordination workflow in 2026 runs in four rounds. Round 1 (design coordination) happens at the schematic design stage — major route clashes between structural framing and primary MEP routes are resolved before detailed modelling begins. This round catches the largest, most expensive clashes. Round 2 (design development) runs on LOD 300 models and catches secondary coordination issues: smaller pipe runs, electrical containment, fire suppression heads, sprinkler branches. Round 3 (construction documentation) runs on the issued-for-construction model and should produce a near-zero clash count. Any remaining clashes at this stage need a formal RFI from the contractor. Round 4 (as-built verification) runs after construction to confirm the as-built model matches the installed conditions. On projects using BIM 360 Coordinate, the clash report is embedded in the platform with automated notifications to discipline leads when their elements appear in new clash results — which eliminates the email loop that slows down coordination on traditionally managed projects. L&T Construction and Tata Projects both operate this loop on their 2026 Maharashtra projects, which is why they ask for Navisworks BIM 360 experience in their coordinator job descriptions.
Navisworks Skills for Civil Engineers in Pune and Sambhajinagar: The 2026 Training Path
The fastest path to professional-level Navisworks proficiency is structured training on real federated models — not standalone YouTube tutorials, which give conceptual knowledge but not the hands-on coordination workflow that employers test in interviews. Here is the 2026 training path at ABC Trainings. Month 1 covers Revit Architecture and Revit Structure essentials — building walls, floors, roofs, structural framing and MEP duct routing to a level where you have a real multi-discipline model to coordinate. Month 2 covers Navisworks Manage in full: NWC model import and aggregation, Clash Detective setup and report generation across all four clash types, clash report reading and assignment workflow, and 4D construction simulation using TimeLiner with an imported MS Project schedule. Month 3 is a live coordination project: run a full three-round coordination cycle on a 200 MB federated model (Architecture + Structure + MEP), produce coordination reports for each round, resolve a minimum of 15 clashes with documented resolution notes and hand over a final coordination report and 4D simulation video as a portfolio deliverable. The CMYKPY stipend of Rs 6,000–10,000 per month is available for eligible Maharashtra students in this programme. Wagholi and Hadapsar centres run weekday batches; Cidco, Osmanpura and Sangli run weekend batches for working engineers.
CMYKPY Stipend: Maharashtra engineering students learning Navisworks and BIM coordination at ABC Trainings can receive Rs 6,000–10,000 per month under the Chief Minister's Yuva Karya Prashikshan Yojana. PMKVY 4.0 has trained 2.1 crore students nationally. Our counsellors check eligibility and handle paperwork in one visit.
Get the BIM Training Brochure + Fees + Batch Dates on WhatsApp
Free 1:1 counselling. Placement track record. CMYKPY/PMKVY eligibility check.
💬 Get Brochure on WhatsApp📞 Call 7039169629About the author: Rahul Patil. 12 yrs experience training engineers across Maharashtra.
Visit Our Centers
- Wagholi (Pune): 1st Floor, Laxmi Datta Arcade, Pune-Ahilyanagar Highway. Call 7039169629
- Hadapsar (Pune HQ): 1st Floor, Shree Tower, opp. Vaibhav Theater, Magarpatta. Call 7039169629
- Cidco (Chh. Sambhajinagar): Kalpana Plaza, opp. Eiffel Tower, N-1 Cidco. Call 7039169629
- Osmanpura (Chh. Sambhajinagar): S.S.C Board to Peer Bazar Road, near Jama Masjid. Call 7039169629
- Sangli: Shubham Emphoria, 1st Floor, Above US Polo Assn., Sangli-Miraj Rd, Vishrambag. Weekend batches available. Call 7039169629
FAQs
What is the step-by-step process to run a clash detection test in Navisworks
The six-step Navisworks clash detection process is: (1) Import all discipline models as NWC files via File > Append — one NWC each for Architecture, Structure and MEP. (2) Open the Clash Detective panel from the Home ribbon. (3) Create a new clash test with a descriptive name and select the two model sets to compare. (4) Set tolerance — 0 mm for hard clashes, service-specific clearance distance for soft clashes. (5) Click Run All Tests and let Navisworks populate the results grid with colour-coded clash status. (6) Group clashes by discipline and generate an HTML or Excel report, then assign each group to the relevant discipline team for resolution.
What is the difference between hard clash and soft clash in Navisworks
A hard clash in Navisworks occurs when two model elements physically intersect — for example, a structural column cuts through a plumbing riser. A soft clash occurs when two elements do not touch but violate a required minimum clearance — for example, a cable tray runs too close to an HVAC valve, leaving insufficient space for a maintenance wrench. Hard clashes are detected with 0 mm tolerance and are always critical. Soft clashes require setting a service-specific tolerance (typically 100–300 mm depending on the MEP system) and represent maintainability problems that are invisible on 2D drawings but cause expensive access issues after construction.
What is 4D simulation in Navisworks and how does TimeLiner work
4D simulation in Navisworks uses the TimeLiner tool to link your BIM model elements to a project schedule imported from MS Project, Primavera P6 or Excel. Each schedule task is linked to the corresponding model elements and assigned a task type (Construct, Demolish, or Temporary). When you run the simulation, TimeLiner plays through the construction sequence week by week, showing which elements are active at each time step. Workflow clashes — where two schedule tasks assign conflicting activities to the same zone simultaneously — become visible as the simulation plays. The output is an AVI video walkthrough of the construction sequence that can be presented to clients and planning authorities, replacing traditional Gantt chart programme reviews.
How long does it take to learn Navisworks for BIM coordination in India
A civil engineering student with basic Revit knowledge can run their first Navisworks clash test in a 2-day hands-on lab session. Professional-level proficiency — setting up a full coordination workflow across 3–4 disciplines, managing multi-round clash reports in BIM 360, running 4D TimeLiner simulations on a real project schedule and producing client-ready coordination deliverables — takes 4–6 weeks of structured training on real federated models. ABC Trainings covers Navisworks Manage in a dedicated 4–6 week module within the PG Diploma in BIM at Wagholi, Hadapsar, Cidco and Sangli centres.